In this guide, we will show you how to set up a shared inbox in your Outlook 365.
Add a shared mailbox to Outlook:
- Open Outlook.
- Choose the File tab in the ribbon.
- Choose Account Settings, then select Account Settings from the menu.
- Select the Email tab.
- Make sure the correct account is highlighted, then choose Change.
- Choose More Settings > Advanced > Add.
- Type in the desired email address and click add.
Office 365 on the web:
1. The first thing you need to make sure is you submit a ticket to your IT department and ask to be added to the specific inbox you are trying to set up as a shared.
2. Once you have done that, navigate to office.com and sign in.
On the left of your browser, you will see the Outlook icon, click on that.
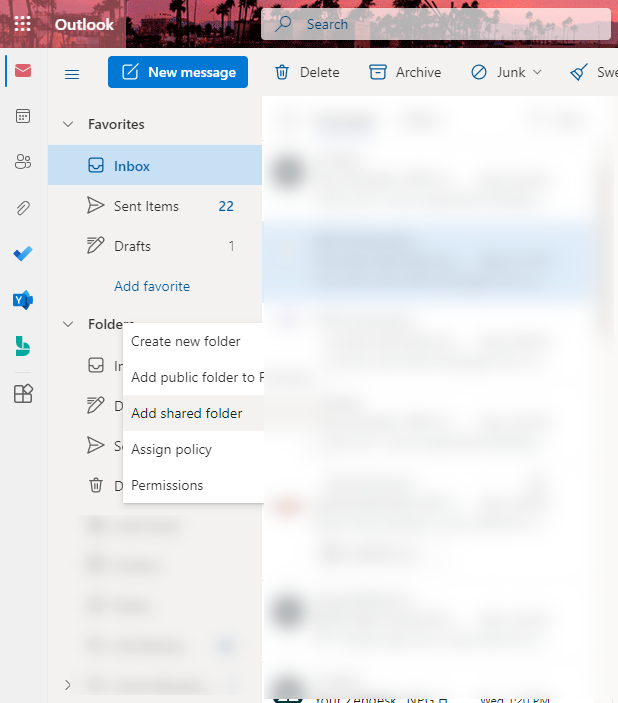
3. Once you are in your Outlook, you want to right-click on the "Folders" category, in the drop-down menu, click on "Add shared folder".
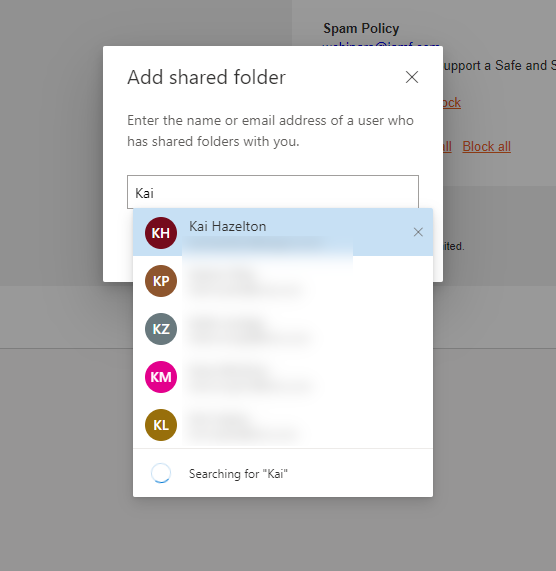
4. In the search field, type the name of the person you are wanting to add to your Outlook. When you find the name, click on it, then click "Add".
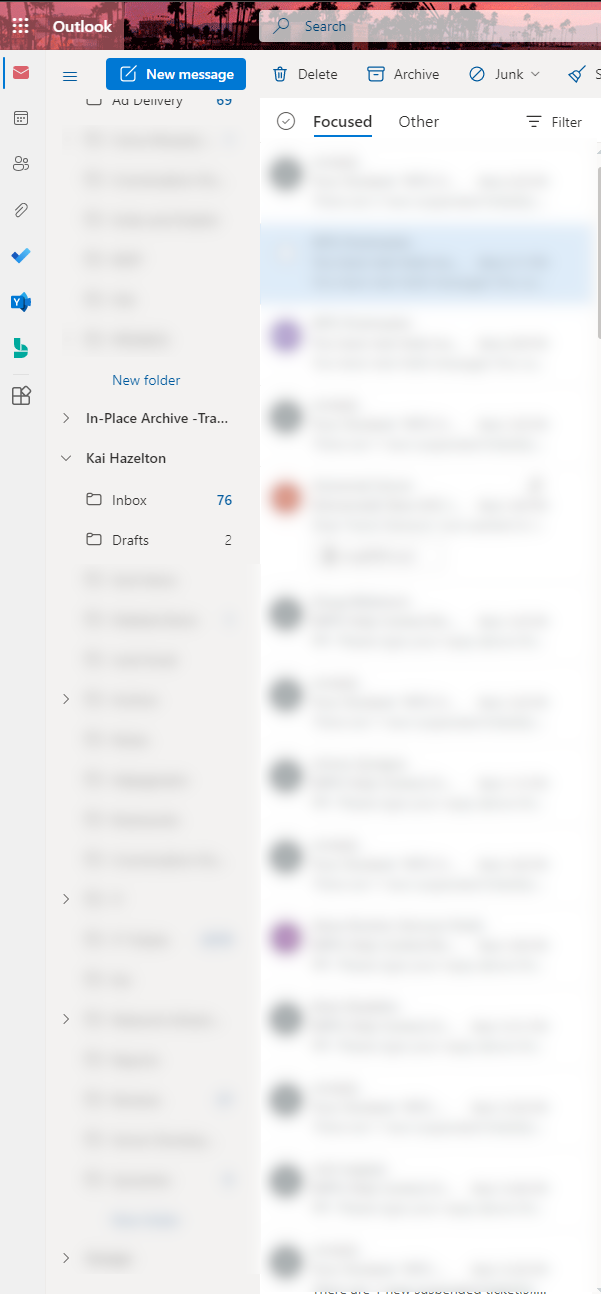
5. Their inbox will now show up on the left side of your Outlook.
Note: If you see this pop-up when selecting the person's inbox, then IT has not processed your permission to view this Inbox yet.
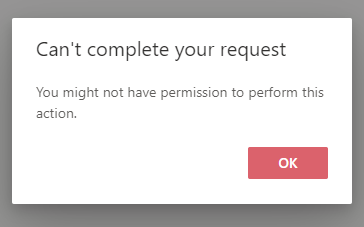
Once IT has processed your request, you will not see this option and will have access to the Shared Inbox.
You are all done!
Comments
I added the folder to my Outlook account.
Please sign in to leave a comment.